 $25 OFF AC REPAIR | $139 MAINTENANCE

SERVICING: CALGARY & THE CMR
DAIKIN FURNACE & AC REPAIR
Looking for reliable Daikin furnace and air conditioner repair or installation services in Calgary? One Stop HVAC provides fast solutions for all Daikin products. Contact us today to schedule your appointment!

Service Availability
7 Days a Week

Top Rated
On Google

Licensed
Techs & Gasfitters

Served Hundreds Of
Local Residents

Great Prices
Always!

Get Your Free
Estimate Today
DAIKIN HVAC SERVICES
Please Select One Of The Following:


Fast Daikin Furnace Repair & Installation Services
Winter in Calgary can be harsh, and a malfunctioning furnace is the last thing you want. With One Stop HVAC, you can count on expert furnace repair and installation services to keep your home warm and cozy.
From routine inspections to urgent repairs or installing a new Daikin furnace, our team guarantees your system runs efficiently and reliably. We prioritize fast, professional service that keeps your home comfortable and gives you peace of mind. With years of experience handling Daikin furnace installations and repairs, we make your comfort our top priority.
My Daikin furnace keeps turning on and off rapidly. What could be causing this?
This is usually short-cycling. It could be a clogged filter, dirty flame sensor, or incorrect thermostat settings. We can inspect and fix it quickly.
The furnace blower is running but there’s no heat. Why?
Often caused by a malfunctioning gas valve, igniter, or flame sensor. Our technicians can diagnose the exact issue and restore heat efficiently.
How can I improve my Daikin furnace efficiency?
Regular maintenance is key! Cleaning or replacing filters, checking ductwork, and calibrating your thermostat can reduce energy bills and extend the life of your furnace.
My furnace smells like burning dust. Is this dangerous?
Usually, it’s just dust on the heat exchanger burning off. However, if the smell persists or is strong, it could indicate an electrical issue or blocked vents. A technician should check it promptly.
Can a failing furnace affect my air quality?
Yes, dirty or malfunctioning furnaces can circulate dust, allergens, or carbon monoxide. We can guarantee your Daikin furnace is safe and clean.
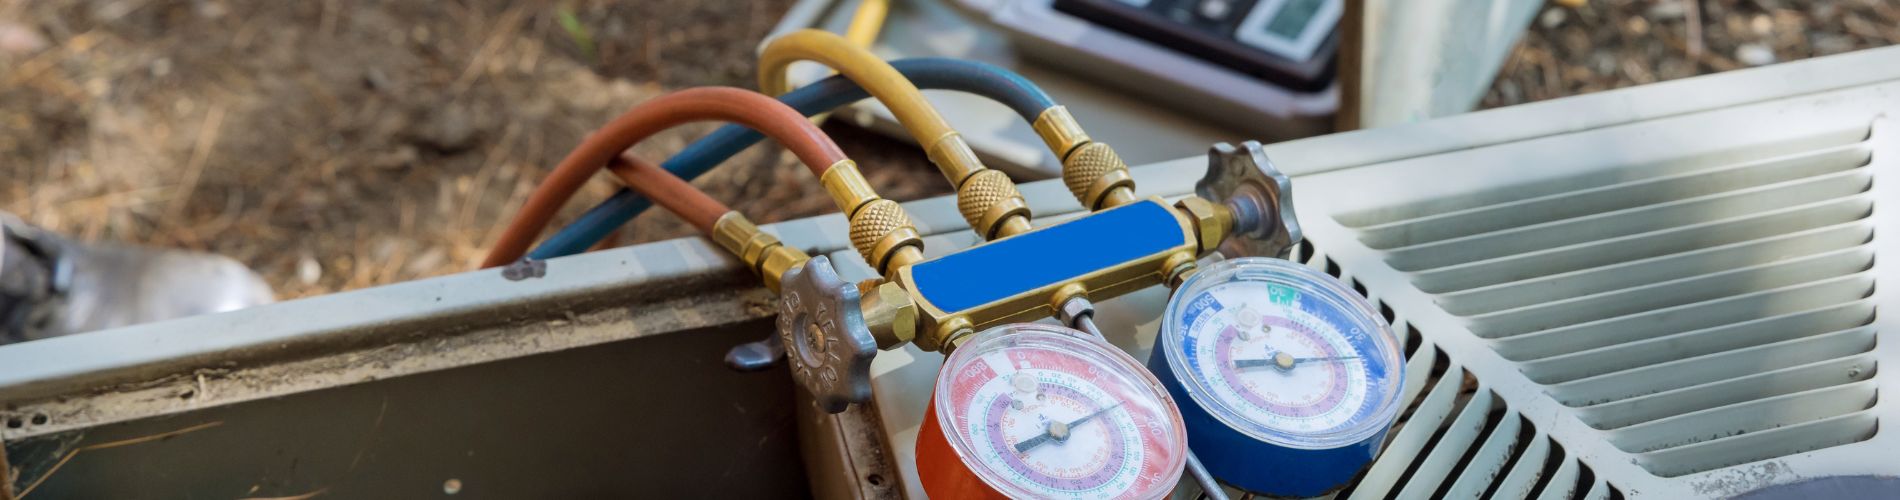
Expert Daikin AC Repair & Installation Services
Calgary summers call for a dependable air conditioning system. One Stop HVAC provides specialized Daikin AC installation and repair services tailored to your home or business.
Our technicians handle everything from minor AC repairs to full installations, making sure your Daikin air conditioning system operates at peak efficiency. Preventative maintenance is key and addressing small problems early can save you from major downtime and costly repairs.

My Daikin AC is running but the air isn’t cold. Why?
This can be caused by low refrigerant, a dirty coil, or a failing compressor. We can inspect your system and restore cooling fast.
The AC unit makes a loud banging sound. Is it serious?
Banging usually indicates loose or damaged components like fan blades or motor mounts. Ignoring it can cause bigger damage, so quick repair is recommended.
How do I prevent my Daikin AC from freezing up?
Keep filters clean, gurantee proper airflow, and schedule annual maintenance. A technician can also check refrigerant levels and coils.
My energy bills spiked after installing a Daikin AC. Is this normal?
Not usually. It could be due to incorrect sizing, poor insulation, or maintenance issues. We can optimize your system to run efficiently.
How long should my Daikin air conditioner last?
With regular maintenance, 12 to 15 years is typical. Components like compressors may need replacement sooner, depending on usage.
Heat Pumps, Thermostats and More
Daikin Heat Pump Repair & Installation
Daikin heat pumps keep your home comfortable year-round, handling both heating and cooling needs. If your heat pump malfunctions, One Stop HVAC provides emergency Daikin heat pump repairs and installations, available 7 days a week. Count on us to keep your home’s HVAC system running smoothly.
My Daikin heat pump struggles to heat my home in extreme cold. Is this normal?
Yes, most heat pumps are less efficient below -15°C. We can recommend supplemental heating or optimize your system for Calgary winters.
The heat pump makes a clicking noise when starting. Should I worry?
Some clicking is normal during startup, but repeated loud clicks can indicate electrical or fan issues. Quick inspection prevents further damage
How often should I service a Daikin heat pump?
Ideally once a year before winter. This includes cleaning coils, checking refrigerant, and inspecting all components for efficiency.
Can I use my heat pump for both heating and cooling without adjusting settings?
Yes, Daikin heat pumps automatically switch modes based on your thermostat settings, but we can optimize for consistent comfort year-round.
The outdoor unit is covered in ice. What should I do?
Minor frost is normal, but heavy ice buildup can damage your system. We can safely defrost and check your unit.
Daikin Ductless AC Repair & Installation
One Stop HVAC provides expert Daikin ductless system repairs and installations across Calgary. Our technicians guarantee fast, reliable service for both emergency repairs and new installations. Your comfort is always our priority.
My Daikin ductless system only blows warm or cold air intermittently. Why?
This is often caused by dirty filters, low refrigerant, or sensor issues. We can diagnose and fix it quickly.
How do I clean a Daikin ductless unit properly?
Clean the filters every 1 to 3 months and schedule professional coil and line inspections annually to prevent buildup and maintain efficiency.
Can a ductless system handle multiple rooms?
Yes, multi-zone Daikin systems can heat and cool several rooms independently, saving energy and improving comfort.
My ductless system drips water indoors. Is this normal?
Some condensation is normal, but leaks often indicate clogged drain lines or improper installation. We can correct it safely.
Are ductless systems noisy?
Daikin ductless systems are very quiet, but unusual sounds usually mean fan or motor issues that require attention.
Daikin Thermostat Repair & Installation
Daikin offers both smart and traditional thermostats to regulate your heating and cooling systems. One Stop HVAC provides fast, reliable thermostat repair and installation services. Keep your home’s temperature just right with our expert support.
The thermostat isn’t responding to temperature changes. Why?
If your Amana thermostat is not working, several factors could be contributing to the issue. Here are some troubleshooting steps to help you identify and potentially resolve the problem:
- Check Power Supply: Ensure that the thermostat has power. Some models may rely on batteries, so check if the batteries need replacement. If the thermostat is hardwired, make sure there’s power to the unit.
- Verify Settings: Double-check the thermostat settings. Ensure it is set to the desired temperature for either heating or cooling, depending on your needs. Also, confirm that the thermostat is in the correct mode (heat, cool, or auto).
- Circuit Breaker Inspection: Check the circuit breaker or fuse box to make sure the circuit providing power to the thermostat is not tripped or blown. Reset the breaker or replace the fuse if necessary.
- Dust and Debris: Inspect the thermostat for any dust or debris that may be affecting its functionality. Clean the thermostat gently with a soft brush or compressed air to remove any accumulated dirt.
- Check Wiring Connections: If you are comfortable doing so, inspect the wiring connections behind the thermostat. Make sure all wires are securely connected to their respective terminals. If you find any loose or disconnected wires, reattach them.
- Calibration: Some thermostats may require recalibration if they are not displaying the correct temperature. Refer to the user manual for instructions on how to calibrate your specific thermostat.
- Software or Firmware Update: If your thermostat is programmable or smart, check if there are any available software or firmware updates. Updating the thermostat’s software can sometimes resolve bugs or glitches.
- Replace Batteries: If your thermostat uses batteries, replace them with fresh ones. Weak or depleted batteries can lead to erratic thermostat behavior.
- Reset the Thermostat: Try performing a system reset. This can be done by turning off the power to the thermostat, waiting for a few minutes, and then turning it back on.
If troubleshooting your Amana thermostat proves unsuccessful, and the issue persists, it’s advisable to seek assistance from a professional HVAC service provider like One Stop HVAC. Their experienced technicians can conduct a thorough inspection of your thermostat and HVAC system, identifying and addressing any underlying issues. Whether it’s a wiring problem, a malfunctioning component, or a more complex technical issue, the experts at One Stop HVAC can provide reliable diagnostics and effective solutions to ensure your thermostat operates smoothly and efficiently. Contacting professionals like us can save you time and help restore comfort to your home or business.
Can I schedule my Daikin thermostat to follow my daily routine?
Adjusting your Amana thermostat is a straightforward process. Here are general steps that should help you adjust the settings:
- Access the Menu: On most thermostats, you’ll need to access the menu to make adjustments. This is often done by pressing the “Menu” or “Settings” button on the thermostat. Refer to your specific thermostat model’s user manual for precise instructions.
- Temperature Adjustment: Once in the menu, navigate to the temperature settings. This may involve using arrow buttons or a touchscreen, depending on your thermostat model. Adjust the temperature setting to your desired level for heating or cooling.
- Mode Selection: Amana thermostats typically have different modes such as “Heat,” “Cool,” and “Auto.” Choose the appropriate mode based on your comfort needs. In “Heat” mode, the thermostat will activate the heating system, while in “Cool” mode, it will activate the cooling system. “Auto” mode allows the thermostat to automatically switch between heating and cooling based on the set temperature.
- Fan Settings (if applicable): If your thermostat has fan settings, you may be able to choose between “On” (constant operation) and “Auto” (operation as needed). Adjust this setting based on your preferences.
- Programmable Thermostats: If you have a programmable thermostat, you can set different temperature schedules for various times of the day. Navigate to the programming menu and adjust the temperature settings for each programmed period.
- Confirm and Save: After making your adjustments, confirm the changes and save the settings. This is typically done by pressing a “Save” or “Confirm” button on the thermostat.
- Check for Wi-Fi Thermostats (if applicable): If your thermostat is a smart or Wi-Fi-enabled model, you may also have the option to control it remotely using a mobile app. Follow the instructions in the user manual to connect and adjust settings through the app.
If you’re looking for expert assistance with adjusting your thermostat or if you have any HVAC-related concerns, we at One Stop HVAC are here to help. Our dedicated team of experienced technicians specializes in ensuring the optimal performance of your heating and cooling systems. Whether you need guidance on thermostat adjustments, maintenance, or any HVAC-related service, we provide reliable solutions tailored to your specific needs. Feel free to contact One Stop HVAC for professional assistance, and let us help you achieve a comfortable and efficient indoor environment. Your satisfaction is our priority, and we’re committed to being your one-stop solution for all your HVAC needs.
Can a faulty thermostat damage my HVAC system?
Resetting your Amana AC thermostat is a simple process that can often resolve minor issues. Here are general steps to reset your thermostat:
- Access the Menu or Settings: On your thermostat, locate the “Menu” or “Settings” button. This is usually on the thermostat’s interface, but the location may vary based on the model. Refer to your thermostat’s user manual for specific instructions.
- Navigate to Reset Option: Within the menu or settings, look for a “Reset” or “Restore Factory Settings” option. Use the arrow buttons or touchscreen to navigate to this option.
- Confirm Reset: Once you’ve selected the reset option, the thermostat may prompt you to confirm the action. Confirm that you want to reset the thermostat to its factory settings.
- Power Cycle (Optional): After the reset, it can be helpful to power cycle your HVAC system. Turn off the power to your heating and cooling system at the circuit breaker or fuse box. Wait for a few minutes, and then turn the power back on. This step ensures a complete restart of the system.
- Reprogram (if applicable): If your thermostat is programmable, you may need to reprogram your desired settings after the reset. Follow the user manual to set your preferred temperature schedule.
- Check for Wi-Fi Thermostats (if applicable): For smart or Wi-Fi-enabled thermostats, you may need to reconnect the thermostat to your home network and any associated mobile apps. Follow the instructions in the user manual to complete the setup.
- Verify System Operation: After the reset and any necessary reprogramming, verify that your AC system is responding correctly to the thermostat settings. Check if the heating or cooling modes activate as intended.
If you encounter challenges while resetting your AC thermostat or if you have any concerns about your HVAC system, One Stop HVAC is here to provide expert assistance. Our team of experienced technicians specializes in HVAC services, including thermostat troubleshooting and adjustments. Whether you need guidance on resetting your thermostat, have questions about your Amana system, or require professional support for any HVAC-related issues, you can rely on One Stop HVAC for reliable solutions. Contact us, and let our experts ensure that your thermostat and HVAC system operate smoothly, contributing to a comfortable and efficient indoor environment. Your satisfaction is our priority, and One Stop HVAC is committed to being your trusted partner for all your HVAC needs
Do you install new smart thermostats for older Daikin systems?
If your Amana thermostat is registering a temperature lower than the set temperature, several factors could be contributing to this discrepancy. Here are some common reasons and troubleshooting steps:
- Location of the Thermostat: Ensure that the thermostat is not exposed to direct sunlight, drafts, or heat sources. These can influence its temperature readings. Additionally, make sure there are no electronic devices or appliances nearby that emit heat and could affect the thermostat’s accuracy.
- Calibration Issues: Over time, thermostats can experience calibration drift, leading to inaccurate temperature readings. Consult your thermostat’s user manual to see if there are instructions on how to recalibrate it.
- Dirty or Faulty Temperature Sensor: The thermostat relies on a temperature sensor to gauge the ambient temperature. If this sensor is dirty or malfunctioning, it can lead to inaccurate readings. Cleaning the sensor or, if necessary, having it replaced can address this issue.
- Heat Sources Nearby: Check for heat-emitting appliances, lamps, or electronics near the thermostat. These can create a localized warm environment, causing the thermostat to register a higher temperature than the actual room temperature.
- System Short Cycling: Short cycling occurs when the HVAC system turns on and off too frequently. This can lead to temperature fluctuations. Consult with a professional HVAC technician to diagnose and address any issues causing short cycling.
- Thermostat Placement: Ensure that the thermostat is installed in an optimal location within your home. It’s generally recommended to place it on an interior wall away from doors and windows for accurate temperature readings.
- Check for Software or Firmware Updates: If your thermostat is programmable or smart, check if there are any available software or firmware updates. Updates can address bugs or glitches that might affect temperature accuracy.
If you find that your Amana thermostat continues to display temperatures lower than the set temperature, and troubleshooting on your own doesn’t resolve the issue, One Stop HVAC is here to help. Our team of experienced technicians specializes in diagnosing and addressing thermostat and HVAC system issues. Whether it’s calibration concerns, sensor problems, or other factors affecting temperature accuracy, we have the expertise to provide reliable solutions. Contact One Stop HVAC for professional assistance, and let our dedicated team ensure that your thermostat and HVAC system operate accurately and efficiently, contributing to a comfortable indoor environment. Your satisfaction is our priority, and we are committed to being
My Daikin thermostat screen is blank. What should I do?
A blank screen usually means a power issue, dead batteries, or a tripped breaker. Check the power source first, then replace batteries if needed. If it still doesn’t turn on, we can quickly diagnose and fix it.
Daikin Furnace Error Codes
One LED flash that stays on continuously
PROBLEM: No signal from the thermostat.
FIX: Turn off the unit’s power and check connections.
Single LED flash
PROBLEM: Furnace lockout due to an excessive number of ignition retries (3).
FIX: Locate and correct gas interruption. Reset by lowering it for 20 seconds and then raise it back, the furnace will reset itself after one hour.
Two LED flashes
Points to a problem with the ignition control circuit, which controls the ignition sequence.
Three LED flashes
PROBLEM: The pressure switch is open.
FIX: Pressure switch may need to be replaced.
Four LED flashes
PROBLEM: Pressure issue. High limit cut-off due to faulty wiring or bad filters.
FIX: Replace or clean the air filter; clean drain tubes of moisture or debris; may have an open limit switch that requires a jump, ensure not to run it with the main switch bypassed.
Five LED flashes
PROBLEM: The unit is sensing a flame without a call for heat.
FIX: Might be the result of a slowly closing valve. Turn off the gas until the valve is fixed.
Seven LED flashes
PROBLEM: Faulty flame sensor.
FIX: The flame sensor might be dirty or placed too far from the flame. Clean if dirty, and replace if defective.
Continuous LED flashing
PROBLEM: Polarity of volt power is reversed.
FIX: Review wiring diagram to correct polarity.
Please note that these error codes are general and may not cover every possible variation. Always refer to your Daikin furnace manual or consult a professional technician for accurate diagnosis and resolution.
Daikin Air Conditioner Error Codes
A1
PROBLEM: Indoor PCB (control board) defect
FIX: Inspect PCB for damage; replace control board if faulty.
A3
PROBLEM: Drain pump or level system error (clogged drain)
FIX: Check and clear any clogs in the drain; clean pump; ensure proper water flow.
A5
PROBLEM: Indoor heat exchanger overheating or freezing (dirty filter/sensor issue)
FIX: Clean or replace air filter, inspect sensor wiring, and replace sensor if defective.
A6
PROBLEM: Indoor fan motor error.
FIX: Inspect fan for obstruction, test motor and capacitor; repair or replace if necessary.
A7
PROBLEM: Swing flap motor error.
FIX: Inspect flap mechanism, check motor wiring, lubricate if needed, replace motor if faulty.
C4/C9
PROBLEM: Heat exchanger or suction air thermistor error (sensor fault).
FIX: Test thermistor resistance, inspect wiring; replace sensor if defective.
E1
PROBLEM: Outdoor PCB defect.
FIX: Inspect outdoor PCB for damage; replace board if necessary.
E3/E4
PROBLEM: High or low pressure protection activation.
FIX: Check refrigerant levels, inspect piping for leaks or blockages; repair as needed.
E5
PROBLEM: Compressor overload/overheat.
FIX: Inspect compressor and electrical connections; ensure proper airflow; replace compressor if faulty.
E6
PROBLEM: Compressor error/faulty start-up.
FIX: Check compressor wiring and start capacitor; repair or replace compressor if needed.
E7
PROBLEM: Outdoor fan motor error/communication issue
FIX: Inspect fan for blockage, test motor and capacitor; repair or replace as needed; check communication wiring.
L5
PROBLEM: Inverter circuit/compressor overcurrent protection
FIX: Inspect the inverter circuit and compressor; ensure proper voltage supply; replace defective components.
U0
PROBLEM: Low refrigerant/leakage/low pressure.
FIX: Check refrigerant level, inspect for leaks, recharge refrigerant as needed.
U2
PROBLEM: Abnormal power supply voltage
FIX: Check incoming voltage, ensure stable supply; repair electrical issues if necessary.
U4
PROBLEM: Communication failure between indoor and outdoor units
FIX: Inspect communication cable connections; repair or replace wiring as needed.
U5
PROBLEM: Communication error with the remote controller
FIX: Replace batteries in remote; check signal path; reset or replace remote if needed.
Please note that these error codes are general and may not cover every possible variation. Always refer to your Daikin AC manual or consult a professional technician for accurate diagnosis and resolution.