 $25 OFF AC REPAIR | $139 MAINTENANCE

SERVICING: CALGARY & THE CMR
AMANA FURNACE & AC REPAIR
Are you in search of dependable Amana furnace and air conditioner repair or installation services in Calgary? One Stop HVAC provides same-day repair services for all Amana products. Contact us now to book your appointment!

Service Availability
7 Days a Week

Top Rated
On Google

Licensed
Techs & Gasfitters

Served Hundreds Of
Local Residents

Great Prices
Always!

Get Your Free
Estimate Today
AMANA HVAC SERVICES
Please Select One Of The Following:


Reliable Emergency Amana Furnace Services Repair
Winter’s chill is on the horizon, and the last thing anyone wants is a difficult furnace. You deserve a cozy home during the colder months, and that’s where One Stop HVAC steps in with our round-the-clock furnace repair and installation services. Our dedicated team is ready to tackle any unexpected hiccups in your Amana furnace, ensuring your home stays warm and inviting.
Whether it’s a regular checkup, a quick fix, or setting up a new Amana furnace, our skilled experts are here to provide not just service, but peace of mind. At One Stop HVAC, we’re all about delivering exceptional service and creating a warm haven for you. With our Amana furnace installation and repair services, backed by years of experience, trust us to keep your home comfortable all winter long. Your comfort is our commitment.
Why won't my Amana furnace not heating ?
Possible causes for your Amana furnace heating:
- Furnace Igniter: If the igniter is damaged or cracked, the furnace won’t heat. Check for cracks and replace if necessary. If not cracked, use a multimeter to test continuity and replace if it’s not present.
- Gas Supply Problem: Confirm gas presence by checking the gas control valve. Use a manometer to check natural gas or propane pressure at the furnace input.
- Incoming Power Problem: Confirm power by checking for a steady light on the control board. If no power, inspect the home’s furnace circuit breaker, fuse, and the furnace power switch.
- Furnace Flame Sensor: Clean or replace the flame sensor if it’s dirty or defective, as it may fail to detect a flame.
- Check Fault Codes: Use the displayed fault codes on the control board for troubleshooting, usually found on the furnace access cover.
- Improper Vacuum or Pressure: Inspect the pressure hose and port on the draft inducer assembly for leaks or obstructions. Replace the pressure switch if necessary.
- Furnace Spark Electrode: Replace the spark igniter if it fails to light the gas burner, checking for damage during inspection.
- Furnace Draft Inducer Motor: Replace the draft inducer motor if it’s defective and causing the ignition process to stall.
- Wall Thermostat Batteries: If the thermostat display is dead, replace the batteries and ensure proper operation.
- Furnace Control Board: If the control board fails, it may not send voltage to the ignition system, resulting in no heat.
- Furnace Wall Thermostat: Replace the thermostat if it fails to turn on the furnace due to faulty contacts. Use a multimeter to test for continuity.
- Furnace Gas Valve Assembly: Replace the gas valve if it’s defective and not opening, causing the furnace to not heat. Test for continuity using a multimeter.
- Furnace Pressure Switch: Replace the pressure switch if it’s not working, as it may not close, resulting in ignition stalls. Test for continuity with a multimeter.
- Air Flow Problem: For the furnace to run correctly, confirm proper airflow. If the furnace draws air from outside, check for obstructions at the air inlet and exhaust outlet pipes.
- Furnace Blower Wheel and Housing: Check for obstructions in the blower wheel and housing. Ensure the wheel is correctly seated and can rotate freely.
- Furnace Control Module: If the control module fails, it may not send voltage to the ignition system, causing the furnace to not heat.
Why is my Amana furnace noisy or loud?
- Clogged Air Filter: A blocked air filter can lead to unusual whistling or low humming sounds. Besides filtering the air, it plays a crucial role in preventing the furnace components from clogging up. It’s advisable to replace the air filter every six months or sooner based on conditions.
- Furnace Blower Wheel: The blower wheel, responsible for circulating air, may create noise if the set screw is loose, causing wobbling. Ensure the set screw is tightly fastened and check for damage. If damaged, replace the blower wheel.
- Furnace Blower Motor: With time, worn-out bearings in the blower motor can result in noise. Lubricate the motor if possible; if the issue persists or if lubrication isn’t feasible, replace the motor.
- Furnace Draft Inducer Motor: The draft inducer motor, drawing air into the burner, may become loud if its bearings wear out. If unusually noisy, consider replacing the draft inducer motor.
- Furnace Draft Inducer Blower Wheel: Inspect the blower wheel for damage, such as a separated center hub or broken fins, as it blows air through the burner system. Replace the blower wheel if any damage is detected.
- Furnace Fan Blade: The blower motor or draft inducer fan motor’s fan blade might be loose or obstructed, causing noise during operation. Inspect, clean, and ensure the fan blade is securely seated on the motor shaft. Replace if damaged.
- Furnace Blower Wheel and Housing: Over time, dust and debris can clog the blower wheel, and the set screw securing it to the motor shaft may loosen. Tighten or replace the set screw, clean the blower wheel cautiously, and be mindful of its sharp fins.
- Furnace Fan Motor: Worn-out bearings in the blower motor or draft inducer fan motor can lead to noise. If applicable, lubricate the motor first; if unsuccessful, consider replacing the motor.
- Furnace Motor: Similar to the blower motor, worn-out bearings in the motor can cause noise. If applicable, try lubricating the motor; if unsuccessful, opt for motor replacement.
- Furnace Draft Inducer Motor Assembly: The draft inducer motor assembly, responsible for drawing air into the burner, may become loud due to worn-out bearings. If unusually noisy, it’s recommended to replace the entire assembly.
Why does the Amana furnace start and then stop?
- Furnace Limit Switch: The flame rollout limit switch keeps an eye on burner heat. If the inducer fan can’t draw enough air or the furnace venting is inadequate, the limit switch halts ignition to prevent heating. If faulty, use a multimeter to test for continuity. Replace if needed.
- Furnace Flame Sensor: The flame sensor checks for a burner flame. If defective, it may fail to detect a flame, causing the control board to cut off gas valve voltage. Clean it, and if the issue persists, replace the flame sensor.
- Furnace Hose: Pressure switch hose carries air creating a negative pressure, allowing the switch to close with sufficient airflow. If damaged or not securely fastened, it may intermittently close, causing the furnace to start and then stop. Inspect and replace if necessary.
- Furnace Tube: Similar to the hose, the pressure switch tube closes with negative pressure. If it has a hole or is not properly fastened, it might intermittently close, leading to the furnace starting and stopping. Inspect and replace if needed.
- Furnace Igniter: The igniter lights the gas burner. If it fails, the gas won’t ignite, causing the furnace to start and stop. Inspect for cracks and test continuity with a multimeter. Replace if necessary.
- Furnace Draft Inducer Motor Assembly: The assembly draws and exhausts air. If defective, it may fail to close the pressure switch, causing ignition stalls and the furnace to stop. If the draft inducer motor assembly is at fault, replace it.
- Furnace Control Board: Regulating power to furnace components, a defective control board may not send voltage to the ignition system, leading to the furnace shutting off. If faulty, consider replacing the control board.
- Furnace Pressure Switch: The pressure switch closes with sufficient airflow. If not working, it may not close, causing ignition stalls and the furnace to stop. Test for continuity and replace if necessary.
- Furnace Draft Inducer Motor: Similar to the assembly, a defective draft inducer motor may lead to ignition stalls and furnace shutdown. If at fault, replace the motor.
- Furnace Flame Rollout Limit Switch: Monitors burner heat; if the inducer fan can’t draw enough air or venting is inadequate, it stops ignition to prevent heating. Test for continuity and replace if needed.
- Air Flow Problem: Proper airflow is essential for continuous furnace operation. If drawing air from outside, check for obstructions at the air inlet. Ensure adequate available air for proper heating, especially if the furnace is in a confined space.
What could be the reasons for the Amana Furnace blower not running?
- Furnace Blower Motor: The blower motor pushes air through the return vent, past the heat exchanger, and into the home’s venting. If the motor is not running despite power reaching it, it may be burned out. Replace a burned-out motor. If the motor hums but doesn’t spin freely, replace it even if unobstructed.
- Furnace Capacitor: A defective capacitor can cause noisy or overheating fan motors, or prevent them from running. Inspect the capacitor; if bulging or leaking, replace it. You can also check the capacitor using a meter.
- Furnace Wall Thermostat: Test if the furnace blower activates by jumping the control board contacts for the red (“R”) and green (“G”) wire terminals. If it works, the wall thermostat may be faulty, unable to signal the control board to activate the blower. Replace the wall thermostat.
- Furnace Wifi Thermostat: Similar to the wall thermostat, if jumping the control board contacts activates the blower, the WiFi thermostat might be defective. Replace the WiFi thermostat to restore blower control.
- Furnace Control Board: The control board manages power distribution to all furnace components. If defective, it may fail to send voltage to the blower motor. Consider replacing the control board if this occurs.
- Furnace Blower Wheel and Housing: Ensure the blower wheel spins freely. If obstructed, it prevents the blower from running. Replace a damaged blower wheel and housing. If in good condition but not spinning freely, the blower motor may have seized and requires replacement.
- Furnace Run Capacitor: A faulty run capacitor can lead to noisy or overheating fan motors or their failure to run. Inspect the capacitor; if bulging or leaking, replace it. You can also check the capacitor with a multimeter.
- Incoming Power Problem: Confirm that power is reaching the furnace. If not, check the furnace circuit breaker or fuse to address the incoming power issue.
Why does the Amana Furnace blower run all the time?
- Furnace Control Board: The control board contains relays managing voltage to each furnace component. If the blower motor relay malfunctions in the closed position, it sends constant voltage, causing the motor to run continuously. Replace the control board if this is the issue.
- Furnace Wifi Thermostat: The WiFi thermostat, with electrical contacts overseeing the furnace’s power supply, can cause continuous motor operation if the blower motor control contact sticks closed. Use a multimeter to test for continuity. If there’s continuity between (R) and (G) terminals in the off position, the thermostat is faulty and needs replacement.
- Furnace Wall Thermostat: Similar to the WiFi thermostat, the wall thermostat’s electrical contacts, when sticking closed for the blower motor control, lead to continuous motor operation. To check, use a multimeter for continuity. If continuity exists between (R) and (G) terminals when off, the thermostat is defective and requires replacement.
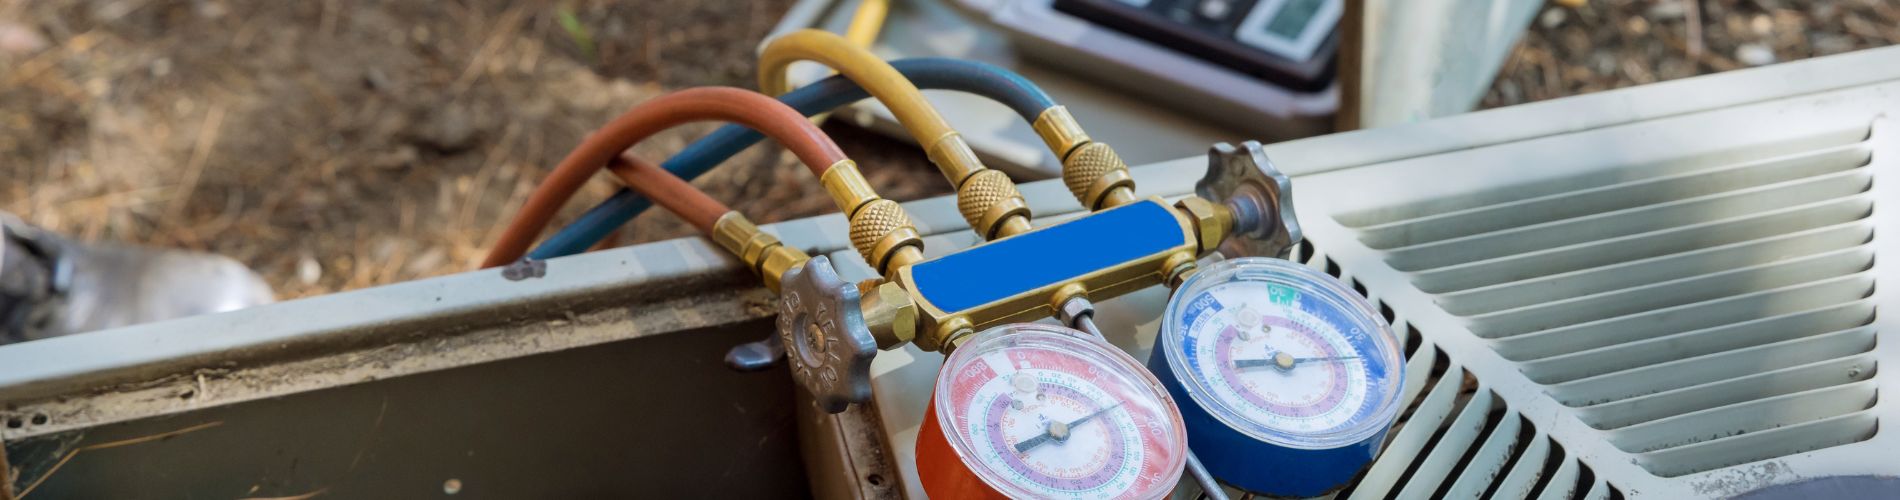
Expert Amana AC Repair & Installation Services
As the blazing Canadian summers roll in, a reliable air conditioning unit becomes essential for keeping indoor spaces comfortably cool. If you need Amana AC repair or a new Amana AC installation, count on One Stop HVAC to deliver personalized solutions centered around your needs.
Our specialized Amana AC repair services aim to address any issues promptly, ensuring optimal performance and extending the life of your air conditioner unit. At One Stop HVAC, we understand the significance of proactive maintenance, recognizing that ignoring even minor concerns could lead to significant inconveniences, discomfort, and potentially costly repairs.

What might be causing the central air conditioner to be noisy or loud?
Possible Causes :
1. Debris Hitting Fan: Over time, debris falling into the condensing unit can create noise when the fan operates. Inspect the fan blade and inside the unit for any debris, and clean the condensing unit as required.
2. Panels Vibrating: If the outdoor condensing unit produces noise, loose grilles or panels may be vibrating. Check for loose panels and tighten them as necessary.
3. Central Air Conditioner Fan Blade: The fan blade on the condenser fan motor may be faulty or loose. To inspect, wiggle the fan motor shaft. Tighten or replace the set screw if the shaft is loose. If the noise persists, replace the fan blade.
4. Central Air Conditioner Condenser Fan Motor: Worn-out bearings in the condenser fan motor can result in loud noise over time. Rotate the motor by hand to check for smooth turning. Replace the motor if it does not turn smoothly.
5. Central Air Conditioner Contactor: The contactor, receiving a low voltage signal from the furnace control board, closes the circuit to send voltage to the condensing unit components. A defective contactor can cause noise and a lack of voltage. If the unit is noisy but not cooling, the contactor may be the issue. Use a multimeter to test for faults.
6 . Central Air Conditioner Compressor: The compressor, responsible for pumping refrigerant, may generate more noise when wearing out. While noisy compressors can still function for years, you may choose to replace it. For compressor replacement, consult a licensed professional.
If you are experiencing ongoing cooling problems, our expert technicians at One Stop HVAC are ready to assist. Contact us for a comprehensive evaluation and effective solutions to restore your AC’s cooling efficiency.
Why is the central air conditioner condenser fan motor not running?
Possible Causes:
- Central Air Conditioner Run Capacitor: If the run capacitor is faulty, it may cause the fan motor to be noisy, overheat, or not run at all. To check for capacitor failure, inspect it for bulging or leaking, and replace it if necessary.
- Central Air Conditioner Fan Motor: To confirm the functionality of the fan motor, use a multimeter to test the incoming voltage. If the motor receives the correct voltage but still doesn’t run, inspect the capacitor for issues. If the capacitor is not bulging or leaking, replace the fan motor.
- Central Air Conditioner Motor: Determine the operational status of the condenser motor by testing the incoming voltage with a multimeter. If the motor receives the correct voltage but refuses to run, inspect the capacitor for faults. Replace the condenser fan motor if the capacitor is in good condition.
- Central Air Conditioner Capacitor: A defective capacitor can lead to a noisy, overheating, or non-functional fan motor. To identify capacitor failure, examine it for bulges or leaks, and replace it if necessary.
- Central Air Conditioner Condenser Fan Motor: Use a multimeter to test the incoming voltage to determine the operational status of the condenser fan motor. If the motor receives the correct voltage but doesn’t run, inspect the capacitor for issues. Replace the condenser fan motor if the capacitor is in good condition.
- Central Air Conditioner Dual Run Capacitor: The dual-run capacitor powers both the compressor and the condenser fan motor. If it is defective, the fan motor may be noisy, overheat, or fail to run. To check for dual-run capacitor failure, use a multimeter. Replace the capacitor if it can’t hold or release a charge, or if it is bulging or leaking.
If you need professional assistance, contact us for a thorough examination and effective repairs.
What could be the reasons for the Amana central air conditioner condensing unit not running?
Possible Causes :
- Amana Central Air Conditioner Compressor: Central air conditioners utilize a compressor to circulate refrigerant through coils. A failed compressor, while uncommon, can lead to the condensing unit not running. Use a multimeter to check for electrical continuity in the compressor. If other components like the capacitor and condenser fan motor are operational, a qualified technician should replace the compressor.
- Amana Central Air Conditioner Wifi Thermostat: The WiFi thermostat, with contacts controlling the furnace, can cause both the furnace and the condensing unit not to run if the contacts fail. If this occurs, consider replacing the WiFi thermostat.
- Amana Central Air Conditioner Condenser Fan Motor: A malfunctioning condenser fan motor can be the cause of the central air conditioner condensing unit not running. Use a multimeter to check for electrical continuity and power reaching the motor. If the blades don’t turn freely, the motor may need replacement.
- Amana Central Air Conditioner Fan Motor: A faulty fan motor may prevent the central air conditioner condensing unit from running. Use a multimeter to check for electrical continuity and power reaching the motor. If the blades don’t turn freely, consider replacing the fan motor.
- Amana Central Air Conditioner Dual Run Capacitor: The dual run capacitor powers the compressor and condenser fan motor. If defective, it may lead to a noisy, overheating, or non-operational fan motor. Inspect the capacitor for issues like bulging or leaking, and replace it if necessary.
- Amana Central Air Conditioner Wall Thermostat: Similar to the WiFi thermostat, a malfunctioning wall thermostat with failed contacts can result in both the furnace and the condensing unit not running. Consider replacing the wall thermostat.
- Incoming Power Problem: The central air condensing unit is powered by 240 volts of electricity. Check the disconnect box for blown fuses or tripped circuit breakers. Use a multimeter to test fuses for continuity. If the disconnect box fuses lack continuity, replace the disconnect box.
- Amana Central Air Conditioner Run Capacitor: The run capacitor for the condenser fan motor and compressor may be faulty. If defective, it can cause a noisy, overheating, or non-functional fan motor. Inspect the capacitor for issues and replace if necessary.
- Amana Central Air Conditioner Control Board: The control board is essential for the proper functioning of the central air conditioner. If defective, it may result in operational issues. Consider replacing the control board.
- Amana Central Air Conditioner Capacitor: Similar to the run capacitor, a faulty capacitor for the condenser fan motor and compressor can lead to issues. Inspect the capacitor for bulging or leaking and replace if necessary.
- Amana Central Air Conditioner Contactor: The contactor, receiving a signal from the furnace control board, enables a voltage to the condensing unit components. A defective contactor may hinder the operation. Use a multimeter to check for 24 volts and replace the contactor if necessary.
If you’re facing issues with your Amana Central Air Conditioner Condensing unit not running, our experienced technicians at One Stop HVAC are ready to diagnose and address the problem. We’ll perform a detailed inspection to identify the root cause, whether it’s a malfunctioning compressor, condenser fan motor, or any other component. Trust One Stop HVAC for reliable service and efficient repairs to bring your central air conditioner back to optimal functioning. Contact us for prompt assistance, and let One Stop HVAC ensure a cool and comfortable environment in your home.
Why is the central air conditioner leaking at the furnace or air handler?
Possible Causes and Actions:
- Evaporator Coil Not Tilted Toward Drain: Typically, installers tilt the evaporator coil slightly towards the drain hole to ensure proper flow of condensate water into the pan. If the coil is not level or improperly tilted, water may not reach the drain hole, potentially causing overflow in the pan.
- Central Air Conditioner Drip Tray: The evaporator is usually tilted towards the drain hole for effective water drainage into the drip tray. If water is leaking from the drip tray without overflowing, a cracked drip tray may be the issue, necessitating replacement.
- Central Air Conditioner Drain Pan: The evaporator is generally tilted towards the drain hole to facilitate proper water drainage into the drain pan. If water is leaking from the drain pan without overflowing, a cracked drain pan may be the cause, requiring replacement.
- Clogged Drain Tube or Drain Trap: During the air conditioner’s operation, condensation forms on the evaporator coil and flows into a drain pan. The water is then directed through a pipe with a trap to a floor drain or condensate pump. If the drain tube or trap becomes clogged, water backup can occur, leading to overflow in the drain pan. If there’s leakage from the evaporator pan, a likely cause is a clogged drain tube or trap, requiring clearing to restore normal water flow.
If you’re dealing with a situation where your Central Air Conditioner is leaking at the furnace or air handler, it’s crucial to address the issue promptly. This water leakage can be attributed to various potential causes, such as a clogged condensate drain line, a damaged condensate pan, or improper installation. Our skilled technicians at One Stop HVAC specialize in diagnosing and resolving such concerns. We’ll conduct a thorough inspection to identify the precise source of the leak and implement the necessary repairs or cleaning procedures. Don’t let water leakage disrupt your cooling system-contact One Stop HVAC for reliable service to rectify the issue and maintain a dry and efficient air conditioning system in your home.
What could be causing the Amana central air conditioner to not blow enough air?
Possible Causes :
- Central Air Conditioner Blower Motor: The blower motor plays a crucial role in circulating cooled air through the home’s venting. A malfunctioning blower motor can lead to insufficient air blowing from the central air conditioner. You can use a multimeter to test the motor for electrical continuity and check if power is reaching it. Additionally, manually turning the blower wheel can help identify any issues with motor bearings.
- Register is Closed or Only Partially Opened: Some air registers have adjustable louvers to control air flow. If there’s low air flow, ensure the louvers are fully open to allow adequate airflow to all rooms.
- Central Air Conditioner Blower Wheel and Housing: Over time, dust and debris can accumulate in the blower wheel and housing, restricting airflow. Cleaning these components with compressed air or a soft brush can help, but caution is needed to avoid damaging the sharp fins. If the blower is damaged, replacement is necessary.
- Clogged Blower Wheel: Similar to the previous point, a clogged blower wheel can significantly impact airflow. Cleaning with compressed air or a soft brush is recommended. Care must be taken to prevent damage to the fins, and if the blower is damaged, replacement is required.
- Central Air Conditioner Run Capacitor: A defective dual-run capacitor can result in the fan motor not running, leading to insufficient air blowing from the central air system. Testing the capacitor with a multimeter and replacing it if it’s unable to hold a charge is advised.
- Central Air Conditioner Capacitor: The capacitor provides voltage to the fan motor, and if defective, it can cause inadequate air blowing. Testing and replacing the capacitor if it cannot hold a charge is recommended.
- Sealed System Problem: Low refrigerant charge can cause ice buildup on the evaporator coil, restricting airflow. Before checking the sealed system, ensure the air filter is not clogged, and the blower is working correctly. Sealed system issues should be addressed by a licensed technician.
- Central Air Conditioner Air Filter: Regularly checking and replacing the air filter, at least twice a year, is crucial. A clogged filter significantly reduces airflow from the furnace or air handler blower.
If you’re experiencing inadequate airflow from your Amana Central Air Conditioner, contacting the experts at One Stop HVAC for a thorough inspection and necessary adjustments can help restore efficient cooling and airflow in your home.
Heat Pumps, Thermostats and More
Amana Heat Pump Repair & Installation
Amana heat pumps make your home cozy all year, handling both heating and cooling. But if your heat pump acts up, One Stop HVAC has your back. We’re here for emergency Amana heat pump repair and installations, available same day. Trust us to make sure your home always has a working HVAC system. Simple and reliable, that’s One Stop HVAC.
Why is my Amana heat pump not cooling?
If your Amana heat pump is not cooling, several factors could be contributing to the issue. It’s essential to troubleshoot the potential causes to identify and address the problem effectively. Here are some common reasons why an heat pump may not be cooling:
- Thermostat Settings: Check the thermostat settings to ensure that the cooling mode is selected and the desired temperature is set correctly.
- Air Filter Issues: A clogged or dirty air filter can restrict airflow, affecting the heat pump’s cooling efficiency. Check and replace the air filter regularly.
- Refrigerant Issues: Low refrigerant levels due to leaks or other issues can impede the heat pump’s ability to cool effectively. A qualified technician should inspect the system, repair any leaks, and recharge refrigerant if necessary.
- Faulty Thermostat: A malfunctioning thermostat may not accurately control the temperature settings. Check for proper thermostat operation and consider replacing it if needed.
- Outdoor Unit Obstructions: Ensure that the outdoor unit (condenser) is free from debris, leaves, and other obstructions that could hinder airflow. Clean the area around the unit regularly.
- Faulty Contactor: A defective contactor in the outdoor unit can prevent the compressor from running. A professional technician should inspect and replace the contactor if necessary.
- Faulty Capacitor: Capacitor issues, such as a failed start capacitor, can affect the heat pump’s ability to start and cool. A technician can test and replace the capacitor if needed.
- Defective Compressor: A malfunctioning compressor can lead to cooling problems. Professional diagnosis is required to determine if the compressor needs repair or replacement.
- Thermistor Problems: Issues with the thermistor, a temperature sensor in the system, can affect cooling performance. A technician can test and replace the thermistor if required.
- Electrical or Wiring Issues: Check for loose or damaged electrical connections and wiring. Faulty connections can disrupt the heat pump’s operation.
Should these troubleshooting measures prove insufficient, it’s advisable to reach out to the skilled technicians at One Stop HVAC. Our experts can conduct a thorough inspection, identify the root cause, and execute the necessary repairs to restore your heat pump’s optimal cooling functionality. Contact One Stop HVAC for dependable and efficient service to ensure your system operates at peak performance.
Why is my heat pump not switching to AC?
If your Amana heat pump is not switching to AC mode, there could be several reasons for this issue. It’s essential to troubleshoot the potential causes to identify and address the problem effectively. Here are some common reasons why an heat pump may not switch to cooling (AC) mode:
- Thermostat Settings: Check the thermostat settings to ensure that the cooling mode is selected. Verify that the desired temperature setting is lower than the current room temperature.
- Thermostat Malfunction: A malfunctioning thermostat may not be sending the signal to switch to cooling mode. Test the thermostat’s functionality and consider replacing it if necessary.
- Delayed Switching: Some heat pumps have a built-in time delay before switching between heating and cooling modes. Wait a few minutes to see if the system automatically transitions to cooling.
- Refrigerant Issues: Low refrigerant levels or refrigerant leaks can impact the heat pump’s ability to switch to cooling mode. A professional technician should inspect the system, repair any leaks, and recharge refrigerant if needed.
- Outdoor Unit Obstructions: Ensure that the outdoor unit (condenser) is free from debris, leaves, and other obstructions. Obstructed airflow can affect the system’s ability to switch to cooling.
- Faulty Reversing Valve: The reversing valve is responsible for changing the refrigerant flow direction, switching between heating and cooling modes. A malfunctioning valve may hinder the switching process and requires professional attention.
- Electrical Issues: Inspect the electrical connections and wiring for any loose or damaged components. Faulty electrical connections can disrupt the heat pump’s operation.
- Faulty Control Board: Issues with the control board can impact the system’s ability to switch between modes. A technician can test and replace the control board if necessary.
- Thermistor Problems: The thermistor, a temperature sensor in the system, may be faulty, affecting the switching process. A technician can test and replace the thermistor if required.
- System Fault Codes: Check the system for any fault codes or error messages. Refer to the user manual or contact the manufacturer for guidance on interpreting and addressing specific fault codes.
If troubleshooting these common issues does not resolve the problem, it’s advisable to seek assistance from the experts at One Stop HVAC. Our qualified technicians specialize in heat pump systems and can conduct a thorough inspection to identify the root cause of the switching issue. With our expertise, we can perform the necessary repairs to ensure your heat pump seamlessly transitions between heating and cooling modes. Contact One Stop HVAC for reliable and efficient service to keep your system operating at its best.
Why is my Amana heat pump only blowing warm air?
If your heat pump is only blowing warm air when you expect it to cool, several factors may contribute to this issue. Here are common reasons and troubleshooting steps:
- Thermostat Settings: Ensure that the thermostat is set to the cooling mode and the desired temperature is lower than the current room temperature.
- Dirty or Clogged Air Filter: A dirty or clogged air filter can reduce airflow, affecting the cooling efficiency. Check and replace the air filter regularly.
- Refrigerant Issues: Low refrigerant levels due to leaks or other issues can impact the heat pump’s cooling capability. A qualified technician should inspect and address any refrigerant issues.
- Faulty Thermostat: A malfunctioning thermostat may not accurately control the temperature settings. Check for proper thermostat operation and replace it if necessary.
- Outdoor Unit Issues: Examine the outdoor unit for obstructions, such as debris or leaves, and clear them to ensure proper airflow.
- Faulty Contactor: A defective contactor in the outdoor unit can hinder the compressor’s operation. Professional inspection and replacement may be necessary.
- Faulty Reversing Valve: The reversing valve controls the direction of refrigerant flow for heating or cooling. If it’s faulty, the heat pump may not switch to the cooling mode. Consult with a technician for diagnosis and replacement.
- Defective Capacitor: Issues with the capacitor, such as a failed start capacitor, can affect the heat pump’s ability to start and cool. A technician can test and replace the capacitor if needed.
- Thermostatic Expansion Valve (TXV) Issues: The TXV regulates refrigerant flow and may impact cooling. A professional can assess and repair or replace the TXV if necessary.
- System Fault Codes: Check for any fault codes or error messages on the heat pump’s control panel. Refer to the user manual or contact the manufacturer for guidance.
If troubleshooting these common issues does not resolve the problem, it’s advisable to seek assistance from a qualified HVAC technician, such as the experts at One Stop HVAC. They can conduct a comprehensive inspection, identify the root cause, and perform the necessary repairs to ensure your Amana heat pump provides the cooling you expect.
How often does my heat pump need Freon?
The frequency at which your Amana heat pump needs refrigerant (commonly referred to as Freon, although Freon is a specific brand of refrigerant) depends on various factors, and in normal operating conditions, a heat pump should not need regular recharging. A heat pump is a closed system, and the refrigerant should remain at a consistent level unless there’s a leak.
If you find that your heat pump requires frequent refrigerant additions, it’s an indication that there may be a refrigerant leak in the system. Refrigerant leaks can lead to diminished cooling and heating efficiency and can impact the overall performance of the heat pump.
Here are some considerations regarding refrigerant levels in a heat pump:
- Normal Operation: In a well-maintained and properly installed heat pump, refrigerant levels should remain stable for the lifespan of the system.
- Refrigerant Leaks: If you notice a decrease in cooling or heating efficiency, or if your heat pump is not maintaining the desired temperature, it’s essential to have a qualified HVAC technician inspect the system for refrigerant leaks.
- Professional Inspection: Only qualified technicians should handle refrigerant-related tasks. If there is a refrigerant issue, they can identify the source of the leak, repair it, and recharge the refrigerant to the appropriate level.
- Preventive Maintenance: Regular preventive maintenance by a licensed HVAC professional can help identify and address potential issues before they lead to significant problems, including refrigerant leaks.
If you suspect that your heat pump may have a refrigerant issue, contact the experts at One Stop HVAC. Our qualified technicians specialize in heat pump systems and can conduct a thorough inspection to identify any potential refrigerant leaks. We prioritize professional and precise solutions, ensuring that your heat pump operates efficiently. Trust One Stop HVAC for reliable service and maintenance, and rest assured that your Amana heat pump will receive the necessary attention to keep it running smoothly. Contact us for all your heating and cooling needs.
How do I know if my Amana heat pump capacitor is bad?
Determining if the capacitor in your Amana heat pump is faulty involves observing the system’s behavior and checking for specific signs. Here are indicators that may suggest a bad capacitor:
- Failure to Start: If your heat pump struggles to start or does not start at all, it could be due to a faulty capacitor. The capacitor provides the necessary electrical boost to initiate the motor.
- Intermittent Operation: A malfunctioning capacitor may lead to erratic operation. Your heat pump might start and stop unexpectedly, exhibit inconsistent performance, or struggle to maintain a steady operation.
- Loud or Unusual Noises: Unusual sounds, such as humming, buzzing, or clicking, may occur when a capacitor is failing. These noises can indicate difficulty in starting the motor.
- Weak Airflow: A capacitor plays a role in powering the blower motor. If the capacitor is defective, the blower may operate at reduced efficiency, leading to weak or insufficient airflow.
- Overheating Components: Capacitor issues can cause other components, such as the compressor or motor, to overheat. If you notice excessively hot components, it may be a result of a failing capacitor.
- Visible Damage: Inspect the capacitor for any visible signs of damage, such as bulging or leaking. Physical damage is a clear indicator that the capacitor needs replacement.
- System Shutdowns: A faulty capacitor can lead to system shutdowns. If your heat pump consistently turns off unexpectedly, the capacitor may be a potential culprit.
If you suspect that the capacitor in your heat pump may be faulty, rely on the expertise of One Stop HVAC. Our skilled technicians specialize in systems and can conduct a thorough inspection to diagnose capacitor issues. Whether it’s difficulty starting, intermittent operation, or unusual noises, we’ll pinpoint the problem and provide efficient capacitor replacement if needed. Trust One Stop HVAC for reliable service, ensuring that your Amana heat pump operates at its best. Contact us for professional assistance and timely solutions to keep your HVAC system in optimal condition.
Amana Ductless AC Repair & Installation
Count on One Stop HVAC for dependable Amana ductless AC unit repair and installations across Calgary and the CMR. Our skilled technicians are at your service, providing emergency repairs for Amana ductless AC units and ensuring same-day installations.. Trust One Stop HVAC for your Amana ductless AC needs, where your satisfaction is our top priority.
How often does a ductless AC system require maintenance?
The frequency of maintenance for a ductless Amana AC system can vary based on several factors, including the specific model, usage patterns, and environmental conditions. However, a general guideline is to perform maintenance at least once a year. Here are some considerations:
- Annual Professional Inspection: Schedule a professional inspection by an HVAC technician at least once a year. A qualified technician can check the system’s components, refrigerant levels, electrical connections, and overall performance.
- Regular Filter Cleaning/Replacement: Ductless AC systems typically have filters that need regular cleaning or replacement. The frequency depends on factors like indoor air quality and system usage. Check the manufacturer’s recommendations, but in general, inspect and clean the filters every month, especially during heavy usage periods.
- Coil Cleaning: The indoor and outdoor coils can accumulate dirt and debris over time, affecting system efficiency. A professional technician can clean the coils during the annual maintenance visit.
- Condensate Line Inspection: Ensure that the condensate line is clear of any blockages, as clogs can lead to water damage. Check and clear the condensate line periodically.
- Check for Refrigerant Leaks: Refrigerant levels should remain stable in a properly functioning system. If you notice a drop in cooling efficiency, it’s essential to have a technician check for refrigerant leaks during maintenance.
- Inspect Insulation and Electrical Components: Check the insulation on refrigerant lines for any damage. Additionally, inspect electrical components, including wiring and connections, to ensure they are secure and in good condition.
- Monitor System Performance: Pay attention to any unusual sounds, odors, or changes in performance. If you notice anything out of the ordinary, schedule a maintenance visit promptly.
For comprehensive and reliable maintenance of your ductless Amana AC system, trust the experienced technicians at One Stop HVAC. Our skilled professionals specialize in systems and can provide annual inspections, filter cleaning or replacement, coil cleaning, and thorough checks of essential components. With our expertise, we ensure that your system operates efficiently, delivering optimal cooling performance. Contact One Stop HVAC for personalized maintenance plans and timely service to keep your ductless Amana AC system in peak condition, providing comfort and reliability throughout the year.
What are the common issues that may require Amana ductless AC repair?
Amana ductless AC systems, like any HVAC equipment, may encounter issues over time. Here are common problems that could necessitate ductless AC repair:
- Faulty Thermostat: Issues with the thermostat can lead to temperature inconsistencies or system malfunctions. Repairs may involve recalibration or replacement.
- Refrigerant Leaks: Refrigerant leaks can result in reduced cooling efficiency. Repairs involve fixing the leaks and recharging the refrigerant to the appropriate level.
- Clogged Air Filters: Dirty or clogged air filters can restrict airflow, reducing system efficiency. Regular cleaning or replacement is essential.
- Condensate Drain Issues: Clogs or blockages in the condensate drain can lead to water leaks. Cleaning the drain or addressing blockages is part of the repair process.
- Faulty Blower Fan: A malfunctioning blower fan can result in poor airflow. Repairs may involve fixing or replacing the fan.
- Compressor Problems: Issues with the compressor can affect the cooling capacity of the system. Repairs may include compressor replacement or repairs.
- Electrical Component Failures: Problems with electrical components such as capacitors, contactors, or wiring can lead to system malfunctions. Repairs involve identifying and fixing these electrical issues.
- Sensor Malfunctions: Sensors that are dirty or malfunctioning may disrupt system operation. Cleaning or replacing the sensors may be necessary.
- Noisy Operation: Unusual or loud noises may indicate issues with components such as the fan, compressor, or other moving parts. Identifying and fixing the source of the noise is part of the repair process.
- System Not Cooling: If the ductless AC system is not cooling adequately, it could be due to various reasons, including refrigerant issues, compressor problems, or thermostat malfunctions. Repairs involve diagnosing and addressing the specific cause.
- Communication Errors: Ductless AC systems with multiple indoor units may experience communication errors between units and the outdoor unit. Repairing these errors may involve troubleshooting the communication system.
For prompt and reliable ductless AC repair, trust the expertise of One Stop HVAC. Our skilled technicians specialize in diagnosing and repairing common issues that may arise in ductless AC systems. Whether it’s a faulty thermostat, refrigerant leaks, electrical component failures, or any other issue impacting your Amana ductless AC’s performance, we provide efficient and effective solutions. Count on One Stop HVAC for professional service, ensuring your system operates at its best. Contact us for personalized repair services and a commitment to restoring the comfort of your space.
Can a ductless Amana AC system be used for both cooling and heating?
Yes, ductless Amana AC systems are designed for both cooling and heating purposes, making them versatile solutions for year-round comfort. These systems utilize advanced heat pump technology, allowing them to efficiently provide both cooling during hot seasons and heating during colder months.
For optimal performance and seamless functionality of your ductless Amana AC system, it’s essential to have it professionally maintained and serviced. One Stop HVAC specializes in systems and offers comprehensive services, including installation, maintenance, and repairs. Whether you need assistance with maximizing cooling efficiency or ensuring your heating function operates flawlessly, our skilled technicians at One Stop HVAC are here to provide top-notch service. Contact us for all your ductless AC needs, and experience comfort and reliability in every season.
Can I use multiple indoor units with a single outdoor unit in a ductless AC system?
Yes, Amana ductless AC systems are designed to support multiple indoor units connected to a single outdoor unit. This configuration, known as a multi-zone or multi-split system, allows you to independently control the temperature in different zones or rooms of your home. It provides flexibility and efficiency, making it an ideal solution for homes with varying cooling or heating needs in different areas.
For the installation, maintenance, or repair of a multi-zone ductless AC system, trust the expertise of One Stop HVAC. Our skilled technicians specialize in Amana systems and can ensure a seamless and efficient setup, allowing you to enjoy customized comfort throughout your living spaces. Contact One Stop HVAC for professional and reliable services tailored to your multi-zone ductless AC system requirements.
What should I do if my Amana ductless AC system is not cooling/heating efficiently?
If your Amana ductless AC system is not cooling or heating efficiently, there are several steps you can take to troubleshoot the issue:
- Check the Air Filters: Dirty or clogged air filters can restrict airflow, impacting efficiency. Clean or replace the filters according to the manufacturer’s recommendations.
- Inspect the Thermostat Settings: Ensure that the thermostat is set to the desired temperature and mode (cooling or heating). Verify that the selected mode matches your comfort needs.
- Clear Obstructions: Check both the indoor and outdoor units for any obstructions, debris, or blockages that might hinder airflow. Ensure that there is sufficient space around the units.
- Examine the Condenser and Evaporator Coils: Dirty coils can affect heat exchange. If accessible, gently clean the coils using a soft brush or a vacuum cleaner. For a more thorough cleaning, consider professional service.
- Verify the Remote Control Batteries: If your ductless AC system is operated with a remote control, ensure that the batteries are in good condition and replace them if needed.
- Check for Error Codes: If your system has a display, check for any error codes. Refer to the user manual for guidance on interpreting error codes and taking appropriate action.
- Inspect the Condensate Drain: Ensure that the condensate drain is clear of any blockages. A clogged drain can lead to water leakage and reduced efficiency.
- Professional Inspection: If the above steps do not resolve the issue, it’s advisable to seek assistance from a qualified HVAC technician. Professional inspection can identify more complex issues, such as refrigerant leaks or compressor problems.
If you’re unable to resolve the efficiency issues on your own, or if you prefer professional assistance, contact One Stop HVAC. Our skilled technicians specialize in Amana systems and can conduct a comprehensive inspection to diagnose and address the root cause of the efficiency problem. Trust One Stop HVAC for reliable and efficient solutions to ensure your ductless AC system operates at its best.
Can I relocate my Amana ductless AC system to a different room or area after installation?
Relocating a ductless AC system, such as an Amana ductless unit, is possible, but it involves a complex process that should be performed by a qualified HVAC professional. Ductless systems consist of both indoor and outdoor units connected by refrigerant lines, electrical wiring, and other components. Here are considerations regarding relocating a ductless AC system:
- Professional Assessment: Before considering relocation, consult with a licensed HVAC technician to assess the feasibility of moving the system. They will evaluate the new space, taking into account factors like refrigerant line length, electrical requirements, and the system’s overall compatibility.
- Refrigerant Lines: Ductless AC systems use refrigerant lines to transport refrigerant between the indoor and outdoor units. These lines have a specific length limitation. If the new location exceeds this limit, additional refrigerant lines may need to be installed, which can be a complex process.
- Electrical Considerations: The new location must have appropriate electrical capacity to support the ductless AC system. Modifications to the electrical system may be necessary.
- Wall Mounting and Space Configuration: The indoor unit is typically mounted on a wall or ceiling in a specific configuration. The new space should allow for proper installation and placement to ensure optimal performance.
- System Reinstallation: Relocating a ductless AC system involves uninstalling the indoor and outdoor units, disconnecting refrigerant lines and electrical connections, and then reinstalling the components in the new location. This process requires expertise and precision.
- Manufacturer’s Warranty: Check the manufacturer’s warranty for any specific terms regarding system relocation. Some warranties may have limitations or requirements for system movement.
For a seamless and successful relocation of your ductless AC system, trust the expertise of One Stop HVAC. Our skilled technicians specialize in Amana systems and can assess the feasibility of moving your unit to a different room or area. We’ll handle the complexities of disconnecting, transporting, and reinstalling the system, ensuring it operates optimally in its new location. Rely on One Stop HVAC for professional and precise services, making the relocation process hassle-free. Contact us for expert assistance and personalized solutions for your ductless AC system needs.
Amana Thermostat Repair & Installation
Amana provides a range of smart and traditional thermostats, central for regulating your home’s heating and cooling. When it comes to Amana thermostat needs, One Stop HVAC has you covered. We offer emergency appointments for Amana thermostat repair and installation. Trust One Stop HVAC for all your Amana thermostat services, where your comfort is our priority.
Why is my Amana thermostat not working?
If your Amana thermostat is not working, several factors could be contributing to the issue. Here are some troubleshooting steps to help you identify and potentially resolve the problem:
- Check Power Supply: Ensure that the thermostat has power. Some models may rely on batteries, so check if the batteries need replacement. If the thermostat is hardwired, make sure there’s power to the unit.
- Verify Settings: Double-check the thermostat settings. Ensure it is set to the desired temperature for either heating or cooling, depending on your needs. Also, confirm that the thermostat is in the correct mode (heat, cool, or auto).
- Circuit Breaker Inspection: Check the circuit breaker or fuse box to make sure the circuit providing power to the thermostat is not tripped or blown. Reset the breaker or replace the fuse if necessary.
- Dust and Debris: Inspect the thermostat for any dust or debris that may be affecting its functionality. Clean the thermostat gently with a soft brush or compressed air to remove any accumulated dirt.
- Check Wiring Connections: If you are comfortable doing so, inspect the wiring connections behind the thermostat. Make sure all wires are securely connected to their respective terminals. If you find any loose or disconnected wires, reattach them.
- Calibration: Some thermostats may require recalibration if they are not displaying the correct temperature. Refer to the user manual for instructions on how to calibrate your specific thermostat.
- Software or Firmware Update: If your thermostat is programmable or smart, check if there are any available software or firmware updates. Updating the thermostat’s software can sometimes resolve bugs or glitches.
- Replace Batteries: If your thermostat uses batteries, replace them with fresh ones. Weak or depleted batteries can lead to erratic thermostat behavior.
- Reset the Thermostat: Try performing a system reset. This can be done by turning off the power to the thermostat, waiting for a few minutes, and then turning it back on.
If troubleshooting your Amana thermostat proves unsuccessful, and the issue persists, it’s advisable to seek assistance from a professional HVAC service provider like One Stop HVAC. Their experienced technicians can conduct a thorough inspection of your thermostat and HVAC system, identifying and addressing any underlying issues. Whether it’s a wiring problem, a malfunctioning component, or a more complex technical issue, the experts at One Stop HVAC can provide reliable diagnostics and effective solutions to ensure your thermostat operates smoothly and efficiently. Contacting professionals like us can save you time and help restore comfort to your home or business.
How do I adjust my thermostat?
Adjusting your Amana thermostat is a straightforward process. Here are general steps that should help you adjust the settings:
- Access the Menu: On most thermostats, you’ll need to access the menu to make adjustments. This is often done by pressing the “Menu” or “Settings” button on the thermostat. Refer to your specific thermostat model’s user manual for precise instructions.
- Temperature Adjustment: Once in the menu, navigate to the temperature settings. This may involve using arrow buttons or a touchscreen, depending on your thermostat model. Adjust the temperature setting to your desired level for heating or cooling.
- Mode Selection: Amana thermostats typically have different modes such as “Heat,” “Cool,” and “Auto.” Choose the appropriate mode based on your comfort needs. In “Heat” mode, the thermostat will activate the heating system, while in “Cool” mode, it will activate the cooling system. “Auto” mode allows the thermostat to automatically switch between heating and cooling based on the set temperature.
- Fan Settings (if applicable): If your thermostat has fan settings, you may be able to choose between “On” (constant operation) and “Auto” (operation as needed). Adjust this setting based on your preferences.
- Programmable Thermostats: If you have a programmable thermostat, you can set different temperature schedules for various times of the day. Navigate to the programming menu and adjust the temperature settings for each programmed period.
- Confirm and Save: After making your adjustments, confirm the changes and save the settings. This is typically done by pressing a “Save” or “Confirm” button on the thermostat.
- Check for Wi-Fi Thermostats (if applicable): If your thermostat is a smart or Wi-Fi-enabled model, you may also have the option to control it remotely using a mobile app. Follow the instructions in the user manual to connect and adjust settings through the app.
If you’re looking for expert assistance with adjusting your thermostat or if you have any HVAC-related concerns, we at One Stop HVAC are here to help. Our dedicated team of experienced technicians specializes in ensuring the optimal performance of your heating and cooling systems. Whether you need guidance on thermostat adjustments, maintenance, or any HVAC-related service, we provide reliable solutions tailored to your specific needs. Feel free to contact One Stop HVAC for professional assistance, and let us help you achieve a comfortable and efficient indoor environment. Your satisfaction is our priority, and we’re committed to being your one-stop solution for all your HVAC needs.
How do I reset my Amana AC thermostat?
Resetting your Amana AC thermostat is a simple process that can often resolve minor issues. Here are general steps to reset your thermostat:
- Access the Menu or Settings: On your thermostat, locate the “Menu” or “Settings” button. This is usually on the thermostat’s interface, but the location may vary based on the model. Refer to your thermostat’s user manual for specific instructions.
- Navigate to Reset Option: Within the menu or settings, look for a “Reset” or “Restore Factory Settings” option. Use the arrow buttons or touchscreen to navigate to this option.
- Confirm Reset: Once you’ve selected the reset option, the thermostat may prompt you to confirm the action. Confirm that you want to reset the thermostat to its factory settings.
- Power Cycle (Optional): After the reset, it can be helpful to power cycle your HVAC system. Turn off the power to your heating and cooling system at the circuit breaker or fuse box. Wait for a few minutes, and then turn the power back on. This step ensures a complete restart of the system.
- Reprogram (if applicable): If your thermostat is programmable, you may need to reprogram your desired settings after the reset. Follow the user manual to set your preferred temperature schedule.
- Check for Wi-Fi Thermostats (if applicable): For smart or Wi-Fi-enabled thermostats, you may need to reconnect the thermostat to your home network and any associated mobile apps. Follow the instructions in the user manual to complete the setup.
- Verify System Operation: After the reset and any necessary reprogramming, verify that your AC system is responding correctly to the thermostat settings. Check if the heating or cooling modes activate as intended.
If you encounter challenges while resetting your AC thermostat or if you have any concerns about your HVAC system, One Stop HVAC is here to provide expert assistance. Our team of experienced technicians specializes in HVAC services, including thermostat troubleshooting and adjustments. Whether you need guidance on resetting your thermostat, have questions about your Amana system, or require professional support for any HVAC-related issues, you can rely on One Stop HVAC for reliable solutions. Contact us, and let our experts ensure that your thermostat and HVAC system operate smoothly, contributing to a comfortable and efficient indoor environment. Your satisfaction is our priority, and One Stop HVAC is committed to being your trusted partner for all your HVAC needs
Why is my thermostat going lower than setting?
If your Amana thermostat is registering a temperature lower than the set temperature, several factors could be contributing to this discrepancy. Here are some common reasons and troubleshooting steps:
- Location of the Thermostat: Ensure that the thermostat is not exposed to direct sunlight, drafts, or heat sources. These can influence its temperature readings. Additionally, make sure there are no electronic devices or appliances nearby that emit heat and could affect the thermostat’s accuracy.
- Calibration Issues: Over time, thermostats can experience calibration drift, leading to inaccurate temperature readings. Consult your thermostat’s user manual to see if there are instructions on how to recalibrate it.
- Dirty or Faulty Temperature Sensor: The thermostat relies on a temperature sensor to gauge the ambient temperature. If this sensor is dirty or malfunctioning, it can lead to inaccurate readings. Cleaning the sensor or, if necessary, having it replaced can address this issue.
- Heat Sources Nearby: Check for heat-emitting appliances, lamps, or electronics near the thermostat. These can create a localized warm environment, causing the thermostat to register a higher temperature than the actual room temperature.
- System Short Cycling: Short cycling occurs when the HVAC system turns on and off too frequently. This can lead to temperature fluctuations. Consult with a professional HVAC technician to diagnose and address any issues causing short cycling.
- Thermostat Placement: Ensure that the thermostat is installed in an optimal location within your home. It’s generally recommended to place it on an interior wall away from doors and windows for accurate temperature readings.
- Check for Software or Firmware Updates: If your thermostat is programmable or smart, check if there are any available software or firmware updates. Updates can address bugs or glitches that might affect temperature accuracy.
If you find that your Amana thermostat continues to display temperatures lower than the set temperature, and troubleshooting on your own doesn’t resolve the issue, One Stop HVAC is here to help. Our team of experienced technicians specializes in diagnosing and addressing thermostat and HVAC system issues. Whether it’s calibration concerns, sensor problems, or other factors affecting temperature accuracy, we have the expertise to provide reliable solutions. Contact One Stop HVAC for professional assistance, and let our dedicated team ensure that your thermostat and HVAC system operate accurately and efficiently, contributing to a comfortable indoor environment. Your satisfaction is our priority, and we are committed to being
Why is my house warmer than the Amana thermostat setting?
If your house is warmer than the Amana thermostat setting, several factors could be contributing to this issue. Here are some common reasons and potential solutions:
- Thermostat Calibration: Over time, thermostats may experience calibration drift, leading to inaccurate temperature readings. Check your thermostat’s user manual for instructions on how to recalibrate it. This can help ensure that the displayed temperature accurately reflects the actual room temperature.
- Location of the Thermostat: Ensure that the thermostat is not exposed to direct sunlight, drafts, or heat sources. If the thermostat is placed in a location that experiences temperature variations, it may not accurately represent the overall temperature of your home.
- Dirty or Faulty Temperature Sensor: The thermostat relies on a temperature sensor to gauge the ambient temperature. If this sensor is dirty or malfunctioning, it can lead to inaccurate readings. Cleaning the sensor or replacing it may resolve the issue.
- System Issues: Check the HVAC system for any issues that might affect its cooling efficiency. This could include problems with the compressor, refrigerant levels, or airflow. If you notice any unusual sounds or reduced cooling performance, it’s advisable to contact a professional HVAC technician for a thorough inspection.
- Airflow Obstructions: Ensure that air vents and registers are not blocked by furniture or other obstructions. Restricted airflow can lead to uneven cooling throughout your home.
- Air Filter: A dirty or clogged air filter can impede airflow and reduce the cooling efficiency of your HVAC system. Check and replace the air filter regularly, following the manufacturer’s recommendations.
- Programmable Thermostat Settings: If your thermostat is programmable, verify that the programmed settings align with your comfort preferences. Incorrect programming may result in your home being warmer than desired.
- Exterior Factors: Consider external factors such as outdoor temperature, humidity levels, and insulation. Extreme outdoor temperatures or insufficient insulation can impact the effectiveness of your HVAC system.
If you find that your house remains warmer than the Amana thermostat setting, and troubleshooting on your own does not resolve the issue, One Stop HVAC is ready to assist you. Our team of skilled technicians specializes in diagnosing and addressing HVAC system concerns, including thermostat-related issues. Whether it’s recalibrating the thermostat, addressing sensor problems, or conducting a comprehensive inspection of your HVAC system, our experts are committed to ensuring your home stays comfortable year-round. Contact One Stop HVAC for professional assistance, and let us provide reliable solutions to keep your home at the optimal temperature. Your satisfaction is our priority, and we are dedicated to being your trusted partner for all your HVAC needs.
Amana Furnace Error Codes
One LED flash that stays on continuously
PROBLEM: No signal from the thermostat.
FIX: Turn off the unit’s power and check connections.
Single LED flash
PROBLEM: Furnace lockout due to an excessive number of ignition retries (3).
FIX: Locate and correct gas interruption. Reset by lowering it for 20 seconds and then raise it back, the furnace will reset itself after one hour.
Two LED flashes
Points to a problem with the ignition control circuit, which controls the ignition sequence.
Three LED flashes
PROBLEM: The pressure switch is open.
FIX: Pressure switch may need to be replaced.
Four LED flashes
PROBLEM: Pressure issue. High limit cut-off due to faulty wiring or bad filters.
FIX: Replace or clean the air filter; clean drain tubes of moisture or debris; may have an open limit switch that requires a jump, ensure not to run it with the main switch bypassed.
Five LED flashes
PROBLEM: The unit is sensing a flame without a call for heat.
FIX: Might be the result of a slowly closing valve. Turn off the gas until the valve is fixed.
Seven LED flashes
PROBLEM: Faulty flame sensor.
FIX: The flame sensor might be dirty or placed too far from the flame. Clean if dirty, and replace if defective.
Continuous LED flashing
PROBLEM: Polarity of volt power is reversed.
FIX: Review wiring diagram to correct polarity.
Please note that these error codes are general and may not cover every possible variation. Always refer to your Amana furnace manual or consult a professional technician for accurate diagnosis and resolution.
Amana Air Conditioner Error Codes
E12: OD CTRL FAIL1
Indicates a general memory error.
E13: HI PRESSURE C (C = CRITICAL)
This error indicates the equipment is experiencing frequent high-pressure faults.
E14: HI PRESSURE M (M = MINOR)
This error indicates the equipment is experiencing frequent high-pressure faults. Control has determined continued operation is acceptable. This indicates there may be a problem with the equipment.
E15: LOW PRESSURE C
This error indicates the equipment is experiencing frequent low-pressure faults.
E16: LOW PRESSURE M
This error indicates the equipment is experiencing frequent low-pressure faults. Control has determined continued operation is acceptable. This indicates there may be a problem with the equipment.
E17: COMPRESSOR FAIL
This error indicates the equipment is experiencing frequent compressor faults.
E18: OD CTRL FAIL2
Indicates the control board may need to be replaced.
E19: PCB OR FAN FAIL
This error indicates the equipment is experiencing frequent outdoor control board and/or motor faults.
E21: EEV CTRL FAIL
This error indicates the equipment is experiencing frequent low discharge superheat faults.
E22: HI DISCH TEMP
This error indicates the equipment is experiencing frequent high discharge temperature faults. Discharge thermistor is not put in the correct position.
E23: DISCH TEMP FAIL
The control has detected that the Discharge Temperature Sensor is out of range.
E24: HPS OPEN
The high-pressure switch is open.
E25: AIR SENSOR FLT
The outdoor air temperature sensor is open or shorted.
E26: PRESSURE SENSOR
The control determines that the pressure sensor is not reacting properly.
E28: COIL TEMP FAIL2
The control has detected that the Outdoor Coil Temperature Sensor is out of range.
E29: LIQ TEMP FAIL
The control has detected that the Liquid Temperature Sensor is out of range.
E30: OD CTRL FAIL3
Indicates the control board may need to be replaced.
E31: HI LEAK CURRENT
The control has detected high leakage current (high voltage).
E32: HI TEMP CTRL1
This error indicates the equipment is experiencing high-temperature faults on the outdoor control board.
E33: HI TEMP CTRL 2
This error indicates the equipment is experiencing high-temperature faults on the outdoor control board. Control has determined continued operation is acceptable. This indicates there may be a problem with the equipment.
E34: CURRENT SPIKE
Board detected a high current condition. This indicates the potential for a short circuit.
E35: HIGH CURRENT
Board detected a high current condition.
E36: STARTUP ERROR
The control encountered an abnormal condition during the startup procedure.
E37: OD CTRL FAIL 4
Indicates the control board may need to be replaced.
E38: COMP VOLTAGE
The control has detected a voltage-related issue with the compressor.
E39: OD CTRL FAIL 5
Indicates the control board may need to be replaced.
E40: COMP MISMATCH
Control determines that its compressor requirement is different than the compressor capability.
E41: LOW REFRIGERANT
The control has detected a low refrigerant condition.
E42: LOW LINE VOLT
Control detects a low power supply voltage condition.
E43: HIGH LINE VOLT
Control detects a high power supply voltage condition.
E44: OP TEMP RANGE
The control detects the outdoor temperature outside the recommended operational range. The unit may continue to operate normally.
E45: NO COOLING TEST
The control is unable to start the Cooling mode test because indoor heat has been turned on by the thermostat. Please set the thermostat to the off position.
E47: NO SYS VER TEST
The control is unable to start the System Verification test because indoor heat has been turned on by the thermostat. Please set the thermostat to the off position.
E48: NO PUMP DOWN
The control is unable to enter the Pump Down Mode because indoor heat has been turned on by the thermostat. Please set the thermostat to the off position.
E49: NO CHARGE MODE
The control is unable to enter Charging Mode because indoor heat has been turned on by the thermostat. Please set the thermostat to the off position.
E50: LINE VOLT CTRL
This indicates there is a voltage issue on the control board. See the service manual for troubleshooting information.
E51: OD COMM ERROR
This indicates potential communication issues have been detected by the outdoor control board.
E52: COMP FAIL MINOR
This error indicates the equipment is experiencing frequent compressor faults. Control has determined continued operation is acceptable. This indicates there may be a problem with the equipment.
E53: PCB PR FAN MIN
This error indicates the equipment is experiencing frequent outdoor control board and/or motor faults. Control has determined continued operation is acceptable. This indicates there may be a problem with the equipment.
E54: EEV MINOR
This error indicates the equipment is experiencing frequent low discharge superheat faults. Control has determined continued operation is acceptable. This indicates there may be a problem with the equipment.
E55: HI DIS TEMP MIN
This error indicates the equipment is experiencing frequent high discharge temperature faults. Control has determined continued operation is acceptable. This indicates there may be a problem with the equipment.
E57: CL LOOP SWEAT
This indicates the control is sensing sweating on the cooling loop.
B0: NO ID AIRFLOW
The estimated airflow from the indoor subsystem is near 0 CFM.
B9: LOW ID AIRFLOW
Estimated airflow from the motor is lower than the airflow requirement.
D0: NO NET DATA
Control board does not have the necessary data for it to properly perform its functions.
D1: INVALID DATA
Control board does not have the appropriate data needed to properly perform its functions.
D2: INVALID SYSTEM
The airflow requirement is greater than the airflow capability of the indoor subsystem.
D3: INVALID CONFIG
There is a mismatch between the shared data and the control physical hardware.
D4: INVALID MC DATA
The memory card data has been rejected.
E11: RUN SYS TEST
This test is required at startup. The installer should navigate to the ComforrtNet User Menu, choose Air Conditioner, then EQUIP TEST and SYSTEM TEST. Selecting ON will run the required test. The display will clear once testing is complete.
Green 'POWER'
Module has power.
Red 'TRIP'
Thermostat demand signal Y1 is present, but the compressor is not running.
Yellow 'ALERT' Flash Code 1
Long Run Time: Compressor is running extremely long run cycles.
Yellow 'ALERT' Flash Code 2
System Pressure Trip: Discharge or suction pressure out of limits or compressor overloaded.
Yellow 'ALERT' Flash Code 3
Short Cycling: Compressor is running only briefly.
Yellow 'ALERT' Flash Code 4
Locked Rotor.
Yellow 'ALERT' Flash Code 5
Open Circuit.
Yellow 'ALERT' Flash Code 6
Open Start Circuit: Current only in the run circuit.
Yellow 'ALERT' Flash Code 7
Open Run Circuit: Current only in the start circuit.
Yellow 'ALERT' Flash Code 8
Welded Contactor: Compressor always runs.
Yellow 'ALERT' Flash Code 9
Low Voltage: Control circuit < 17VAC.
Please note that these error codes are general and may not cover every possible variation. Always refer to your Amana AC manual or consult a professional technician for accurate diagnosis and resolution.